

Home / Blog / Internship at Medsby
3D Printing, Microfluidics & BioprintingUnlearning to Build: My 3-Week Journey Through Microfluidics, 3D Printing and Bioprinting at Medsby

Quick answer
In a 3-week internship at Medsby in Coimbatore, a bioengineering student built a magnetic stirrer from scrap parts, learned FDM and resin 3D printing, found out why resin-printed microfluidic chips clog, and helped assemble a 3D bioprinter from the ground up.
- Why chips clogged: narrow channels, trapped uncured resin and light bleed, not just print angle.
- Biggest lesson: manufacturing constraints matter as much as design.
- Mindset: mistakes rarely mean starting over; they usually need another solution.
Freedom to Learn Beyond the Syllabus

Project Engineering Intern, Medsby
When I first walked into Medsby, I experienced freedom, something I had never felt in a classroom before. There was the freedom to explore, to build, to make mistakes and, most importantly, to learn beyond a syllabus.
For the first time, I wasn’t limited to what a course expected of me. I could pursue whatever interested me, provided I was willing to research, read, ask questions and show up every single day with curiosity and determination.
That was all Guru Sir, CEO of Medsby Healthcare and Engineering Solutions, expected from me. He had an open mind, listened to every idea with patience and encouraged me to think independently rather than simply follow instructions. Instead of giving me answers, he gave me opportunities to discover them.
Building a Magnetic Stirrer from Scrap
One of the first challenges we faced was surprisingly simple: we didn’t have a magnetic stirrer.
We needed one to prepare our first alginate-based bioink. Alginate has to be mixed slowly and uniformly to dissolve completely without introducing too many air bubbles, which makes a magnetic stirrer one of the most basic yet essential pieces of equipment for my project. Rather than buying one, Guru Sir encouraged me to build it ourselves.
Until then, I had only worked with basic electronics. I understood the theory, but I had very little hands-on experience. Like many engineering students, I had spent years doing exactly what my coursework required and rarely ventured beyond it. Building laboratory equipment from scratch had never even crossed my mind.
But that’s when I realised something that reflects the engineering mindset in India: we are a country that often finds solutions in scrap. Instead of waiting for expensive equipment, we built our own magnetic stirrer using a discarded PC fan, a pair of magnets and a few readily available electronic components. It was simple, inexpensive and easy to fabricate.
From FDM Printing to Resin: The Keychain Challenge
That was only the beginning. From there, I learned FDM 3D printing, explored CAD modelling in Fusion 360 and eventually moved on to resin printing. I even got the opportunity to teach students how to perform resin printing. Every new skill opened another door.
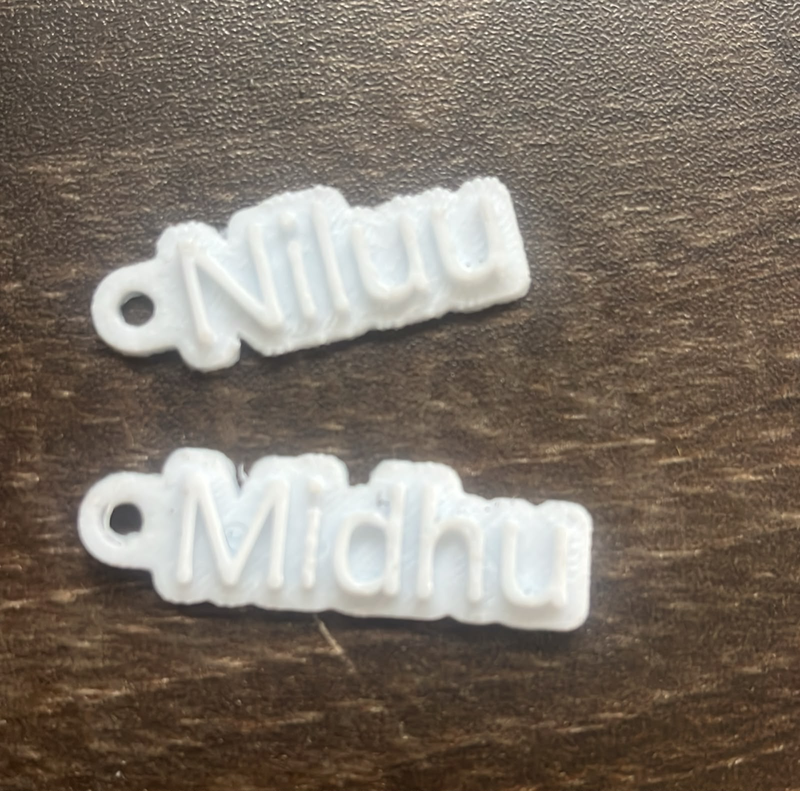
Before diving into complex models, Guru Sir gave me a simple challenge: design and print a keychain with my name and my colleague’s name on it. At first it seemed like a small exercise, but it became my introduction to the entire 3D printing workflow. I learned how to prepare a model, slice it, choose the right print settings, load the filament and troubleshoot issues during printing. That keychain wasn’t just a souvenir; it was my first successful print and the confidence boost I needed to keep learning. Every expert starts with something simple, and for me, it began with a personalised keychain.
Why Our Resin Microfluidic Chips Kept Clogging
One of our goals was to fabricate a microfluidic chip. It took two failed attempts, and a lot of learning, to understand why.
Attempt 1: a downloaded design
I first downloaded an existing design from Thingiverse and printed it on the resin printer. The print looked successful from the outside, but when we tried to use it, the channels were completely clogged with uncured resin. That single failed print taught us that printing a microfluidic device is very different from printing ordinary 3D models.
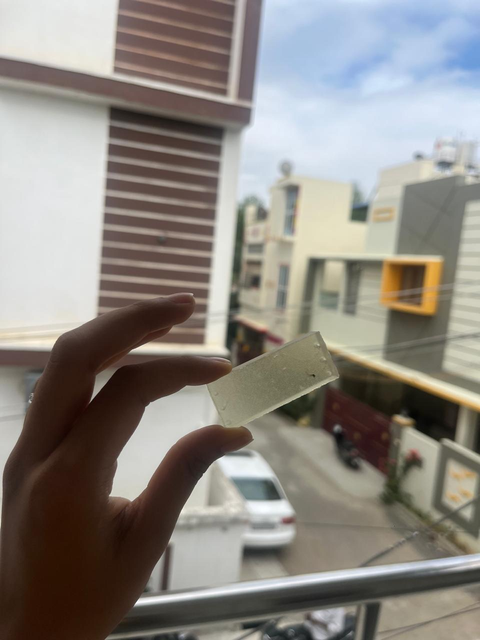
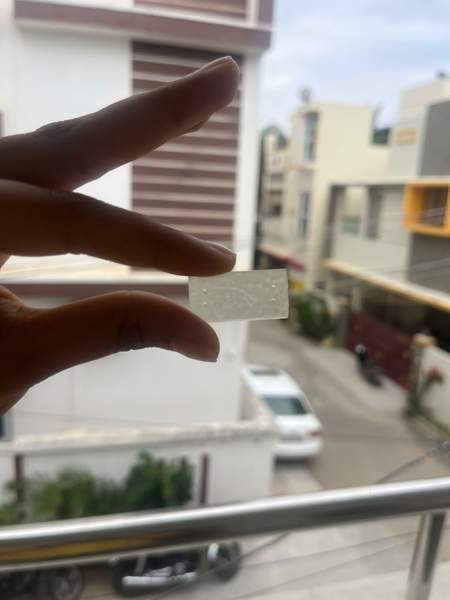
Attempt 2: our own design in Fusion 360
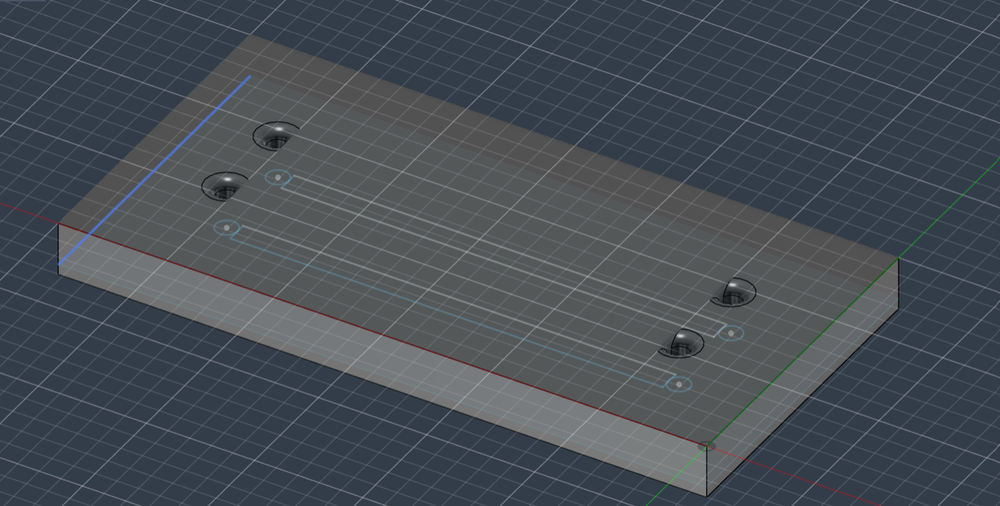
Encouraged by what we had learned, I designed my very first microfluidic chip in Fusion 360. This time we thought about the manufacturing process itself. Since resin can get trapped inside enclosed channels during printing, we hypothesised that orienting the chip at a 45° angle would let gravity drain the resin and reduce clogging. It seemed like a logical solution. But it failed again, and the channels remained clogged.
The real cause: light bleed and channel size
Instead of seeing another failed print, we saw another experiment. Eventually we realised that orientation alone wasn’t the real problem. The channels were simply too small for reliable resin printing. In resin printers, each layer is cured with UV light, and light scattering, often called light bleed, can partially cure resin beyond the intended boundaries. When channels are extremely narrow, this unintended curing can close them entirely. Even after printing, uncured resin stays trapped in the tiny passages unless the channels are large enough, or specifically designed for resin drainage and cleaning.
| Attempt | What we tried | Result | Lesson |
|---|---|---|---|
| 1 | Downloaded Thingiverse chip, resin printed | Channels clogged with uncured resin | Microfluidic printing differs from ordinary 3D printing |
| 2 | Own Fusion 360 design, printed at 45° | Channels still clogged | Orientation alone does not solve it |
| Cause | Channel size, orientation and resin limits together | Light bleed closes narrow channels | Design for manufacturability |
Looking back, those failed prints were far more valuable than a successful one would have been. They taught me not just how microfluidic chips are designed, but why manufacturing constraints are just as important as design itself. They deepened my understanding of resin printing, design for manufacturability and iterative engineering, and they changed the way I approached problems.
Learning to Build a 3D Bioprinter
Our next objective was to bioprint a simple tissue scaffold with a gyroid structure. We planned to use toothpaste as the bioink. Toothpaste isn’t a biological material, but it is commonly used to calibrate and test extrusion-based bioprinters before working with actual bioinks because of its similar extrusion behaviour.
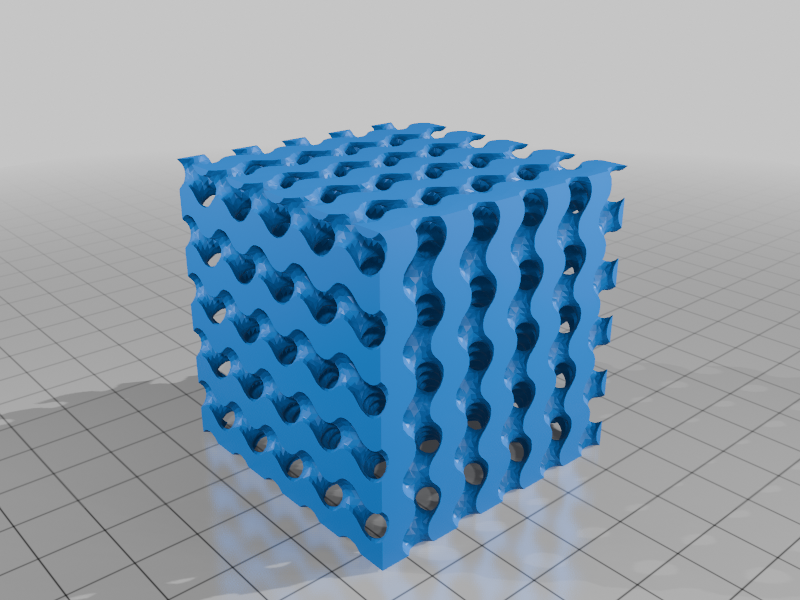
The bioprinter we planned to use had been designed and built by Guru Sir himself. In fact, it was one of the biggest reasons I chose this internship. Seeing someone build a bioprinter from scratch made me realise that innovation doesn’t always require expensive commercial systems; it requires curiosity, persistence and the willingness to build.
But when we finally prepared to print the scaffold, nothing happened. The printer was clogged and no longer functional. I expected that we would troubleshoot it or repair a few components. Instead, I was told something I never expected: “You need to learn how to assemble and build a 3D bioprinter.”
Just three weeks earlier, I barely knew how machines worked. I had never imagined disassembling one, let alone rebuilding it. Yet instead of feeling intimidated, I was encouraged to take it apart, understand every component and build it back from the ground up.
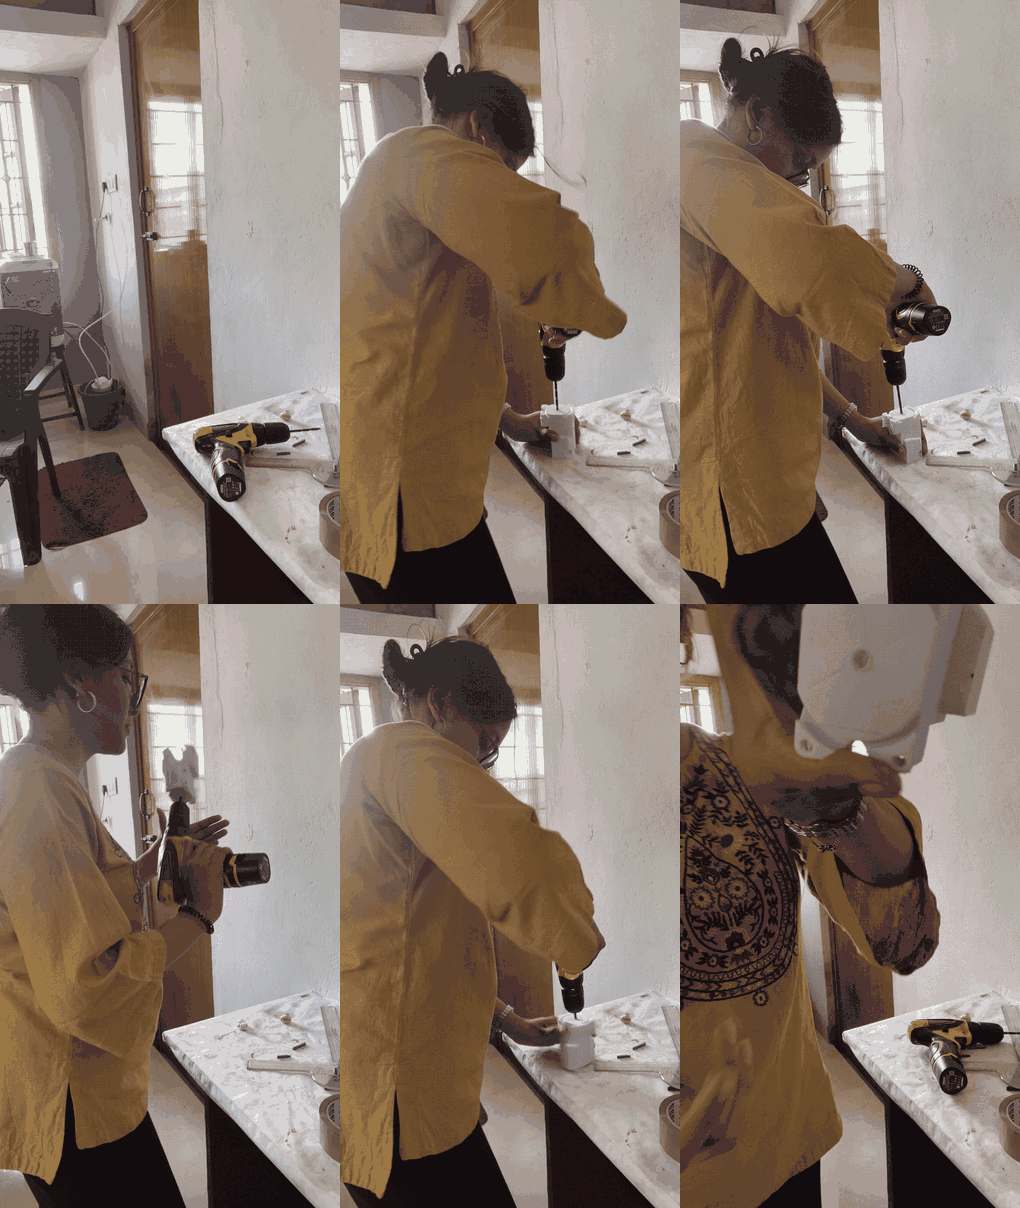
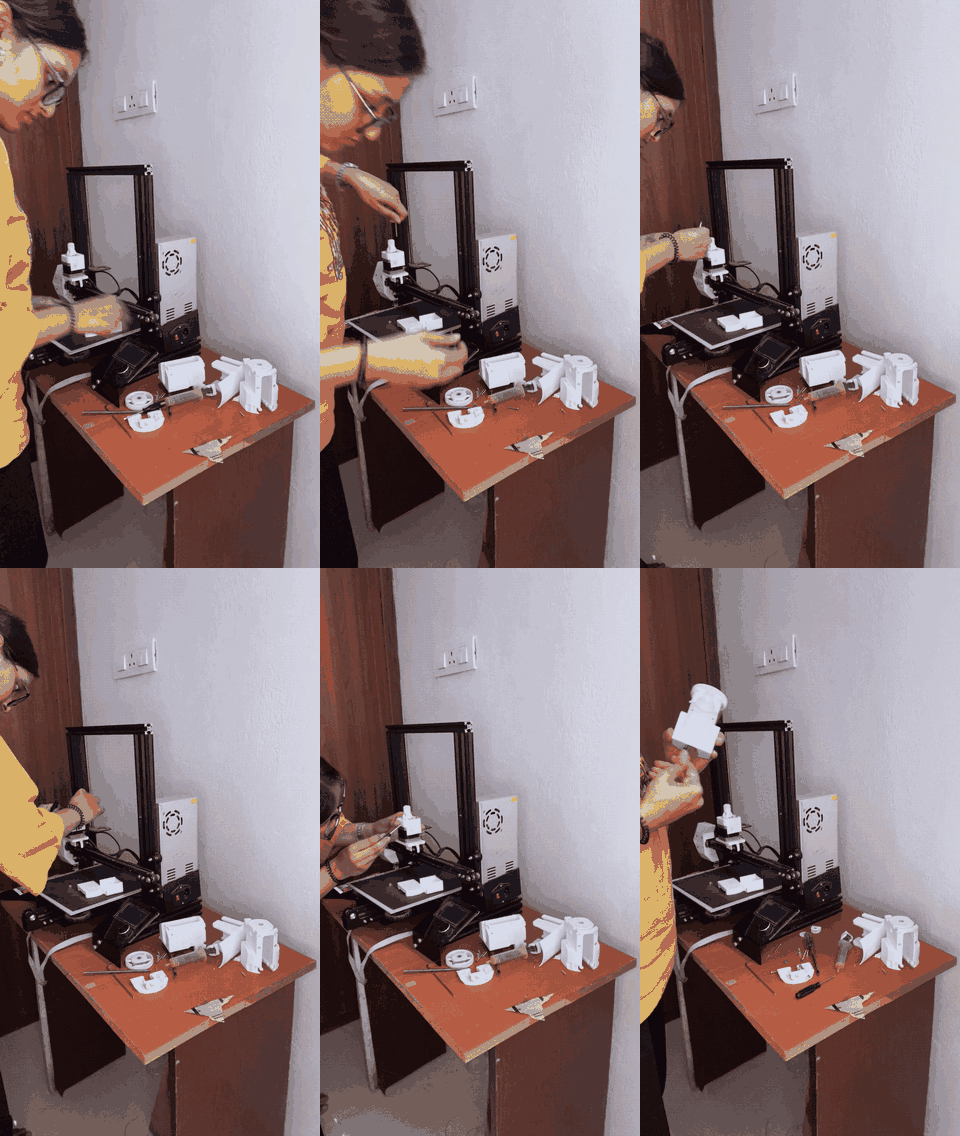
Along the way I made a mistake. I forgot to set the proper support distance on a core part of the printer, so the supports fused too closely to the model and became extremely difficult to remove. Rather than discarding the part and starting over, we adapted. With careful drilling and a bit of patience, we salvaged the print and continued the assembly. That taught me another important lesson: mistakes don’t always mean starting from scratch. Sometimes they simply require another solution.
Piece by piece, we assembled the frame, mounted the components, understood how each mechanism worked and finally built the bioprinter ourselves.
What a 3-Week Internship Taught Me
When I applied for this internship, I thought I would simply learn what 3D bioprinting was. I never imagined I would learn how to build the machine that makes it possible.
This internship wasn’t just about understanding technologies like 3D printing, microfluidics or bioprinting. It was about changing the way I approach engineering itself. The best education doesn’t always come from getting things right the first time. It comes from taking things apart, asking questions, making mistakes, rebuilding and having the courage to try again.
If you are a student in Coimbatore or anywhere in Tamil Nadu who wants to learn by building, explore Medsby’s 3D printing services, industrial training and academic lab programmes. You can also read the first part of this story in 3D Printing and Microfluidics: An Intern’s Journey at Medsby.
Frequently Asked Questions
What is light bleed in resin 3D printing?
Light bleed is the scattering of UV light in a resin printer that can partially cure resin beyond the intended boundaries. In very narrow microchannels, this unintended curing can close the channel entirely.
Why do resin-printed microfluidic chips clog?
Uncured resin gets trapped inside enclosed channels, and light bleed can partially cure resin inside very narrow passages. Unless the channels are large enough, or designed for resin drainage and cleaning, they stay blocked.
Does tilting a resin print to 45 degrees prevent clogged channels?
Not on its own. In our test, a 45° orientation did not clear the channels. The real problem was a combination of channel dimensions, orientation and the limits of resin printing technology.
What is alginate bioink and why use a magnetic stirrer?
Alginate is a common base material for bioinks. It has to be mixed slowly and uniformly so it dissolves completely without introducing too many air bubbles, which is why a magnetic stirrer is such a basic but essential tool.
Why test a bioprinter with toothpaste?
Toothpaste is not a biological material, but its extrusion behaviour is similar to many bioinks, so it is commonly used to calibrate and test extrusion-based bioprinters before working with actual bioinks.
Where can I do a 3D printing or bioprinting internship in Coimbatore, Tamil Nadu?
Medsby, based in Coimbatore, offers hands-on learning in 3D printing, microfluidics and bioprinting for students, along with 3D printing services and industrial training. Contact the team to ask about opportunities.
Project Engineering Intern, Medsby, Coimbatore | B.Tech Bioengineering student
Niilee is currently pursuing a B.Tech in Bioengineering and has always been someone who loves learning. Whether through books, conversations, new experiences or scientific discoveries, she enjoys understanding how things work and exploring ideas that challenge her to think differently. Curiosity has always been one of her biggest motivations, and it is what drew her towards fascinating technologies like 3D printing and microfluidics in the first place.
Founder & CEO, Medsby Healthcare & Engineering Solutions
Guruprasandh is the founder of Medsby, a Coimbatore-based manufacturer and technology service provider established in 2014, specializing in wearable technology, healthcare devices, and 3D printing. With over a decade of experience in healthcare technology and engineering, he is committed to knowledge sharing, upskilling, and educational training for students and young innovators.
Keep exploring
Want to learn by building?
Talk to the Medsby team in Coimbatore about 3D printing, microfluidics, bioprinting and hands-on training for your college, lab or startup anywhere in India.
Industrial training Talk to our team