

Home / Blog / Syringe Extrusion Bioprinting
3D BioprintingFrom Plastic to Paste: My Journey into Syringe Extrusion Bioprinting

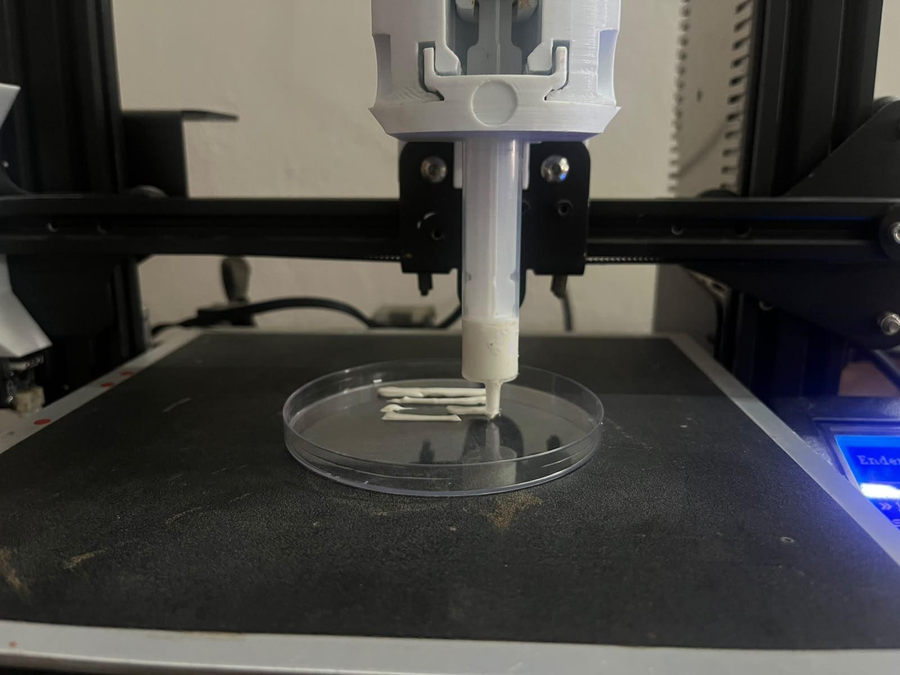
Quick answer
Syringe extrusion bioprinting pushes a viscous material through a needle using a stepper-driven plunger. It looks like 3D printing, but the physics is different: you control pressure, not just movement. This is the story of rebuilding one such printer, learning on toothpaste and editing G-code to print a gyroid scaffold.
- Toothpaste works as a practice bioink because it is thick, shear-thinning and safe.
- Calibrate first: four simple lines teach more than a complex scaffold.
- A needle changes everything: a smaller outlet means more pressure and new settings.
Chapter 1: What 3D Bioprinting Really Is
Project Engineering Intern, Medsby
When I began my internship, I thought 3D bioprinting was simply another version of 3D printing: replace plastic with a biological material, press print and let the machine do the rest. It didn’t take long to realise how wrong that assumption was.
One of the first things I worked on was printing a simple gyroid scaffold on a custom-built syringe extrusion bioprinter. Instead of filament, the printer used a syringe filled with toothpaste, chosen as a safe, easy and inexpensive substitute for bioinks. At first I questioned why toothpaste was being used at all. As I learned more, I discovered that it behaves like many printable hydrogels: it is highly viscous and shear-thinning, and its flow depends on pressure, nozzle geometry and printing conditions. It was the perfect material for understanding extrusion without the added complexity of living cells.
The biggest surprise came when I opened Cura, the free, open-source slicing software from UltiMaker that we used to prepare models. Our printer worked very differently from the machines Cura was built for. Every movement of the stepper motor became the linear movement of a syringe plunger, creating pressure inside the syringe and forcing toothpaste through a dispensing needle. The same software was being used, but the physics had completely changed.
Suddenly, settings such as layer height, line width, flow, print speed, acceleration and retraction were no longer just values to enter. Each one represented a physical process.
| Setting or variable | What it controls in syringe extrusion |
|---|---|
| Print speed | The volumetric flow rate the syringe must supply |
| Layer height | Whether one deposited strand can support the next |
| Flow | How much material leaves the syringe, and the pressure inside it |
| Acceleration and jerk | Pressure fluctuations in the extrusion system |
| Nozzle diameter | Flow resistance, and so the pressure required |
| Viscosity | How much pressure is needed to make the material flow |
Successful bioprinting, I realised, was not about finding the “correct” settings but about understanding the engineering principles behind each one. The printer wasn’t simply following commands; it was obeying the laws of mechanics, fluid dynamics and material science. Before I could print anything, I had to understand the printer itself.
Chapter 2: Meeting the Printer and Rebuilding It
The plan was simple: print a gyroid scaffold using toothpaste and start experimenting. Instead, the first lesson came before a single layer was printed. The custom-built syringe extrusion bioprinter that Guru Sir had designed and built was no longer working properly. The extrusion system was clogged and no material came out of the needle.
Rather than troubleshooting the clog and moving on, my mentor suggested something I never expected: “If you want to understand this printer, rebuild it.” At first the idea felt overwhelming. I had only worked with assembled machines and never built a 3D printer from individual components. Suddenly I was being asked to dismantle and reconstruct an entire one, and I thought I could never do it.
The first step was to identify the parts that needed replacing. Some printed components had worn out while others were fine. Using the existing CAD models as a reference, I 3D printed the replacements. One core structural component needed support material because of its overhangs, and I started the print without paying attention to the support settings.
That confidence quickly disappeared. I had forgotten to set an appropriate support distance, so the supports fused to the part and several mounting holes were completely filled with filament. With cutters, and eventually a drill, I removed the supports and cleared each hole until the screws could pass through. It taught me that the quality of a printed part depends as much on slicing parameters as on the CAD design, and that good engineering means designing a part to be manufactured successfully.
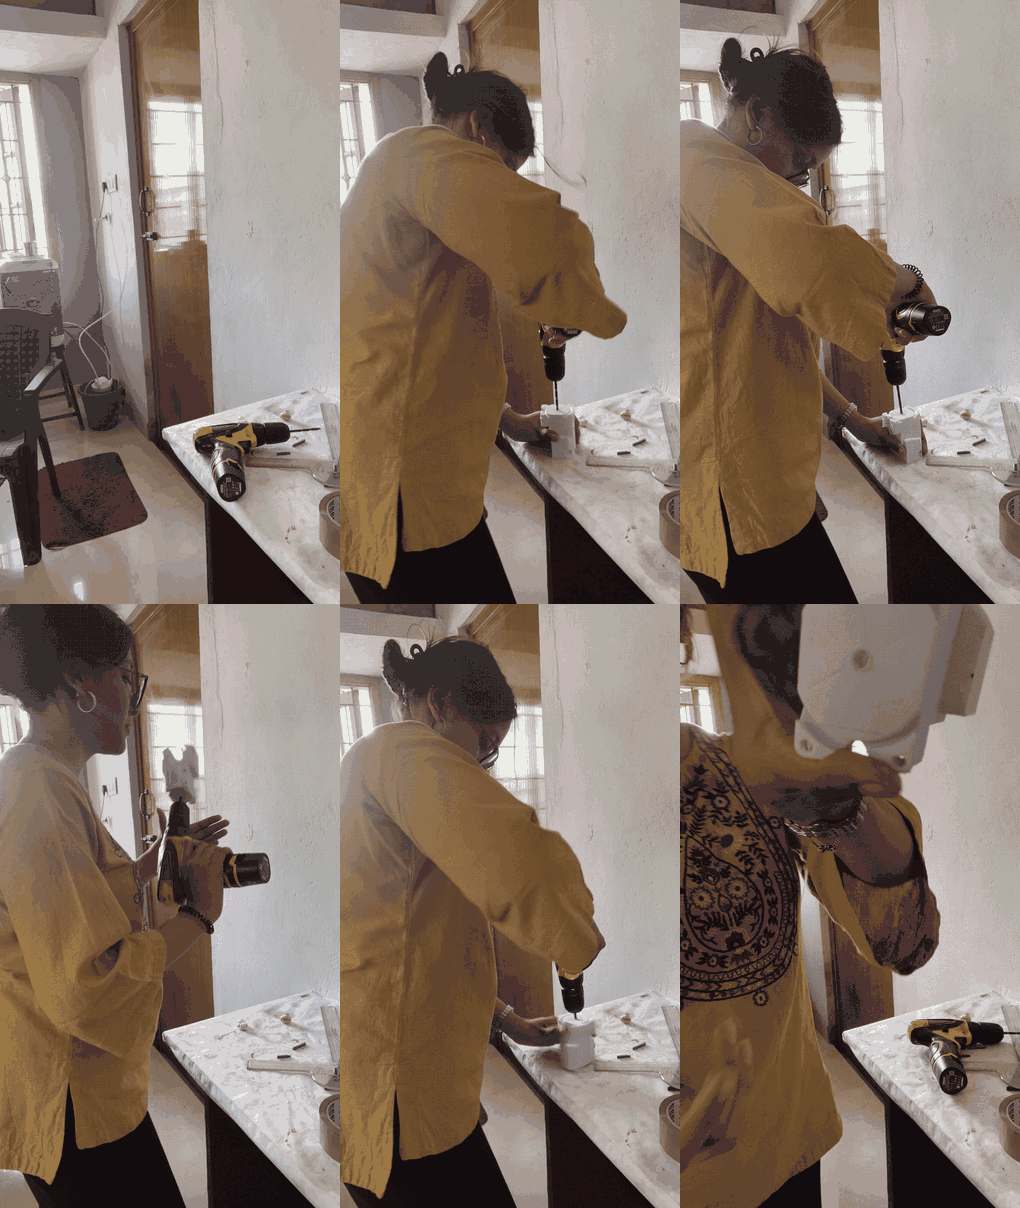
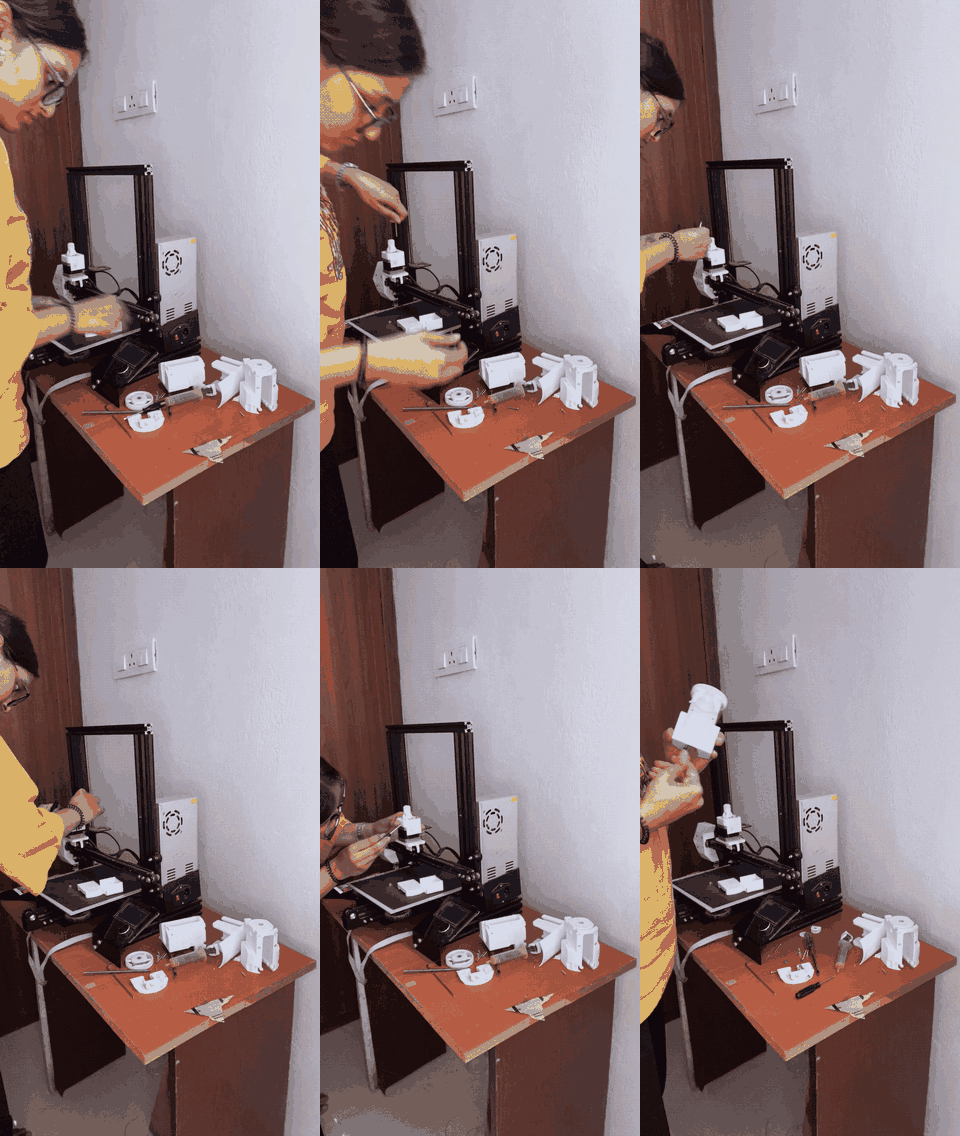
Then the real work began. The printer was disassembled piece by piece: the frame, linear motion system, lead screw, stepper motor, syringe holder, plunger mechanism and extrusion assembly all had to be examined, cleaned and reassembled. What had looked like a single machine became a set of interconnected systems. As I rebuilt it, I saw the whole chain behind extrusion: a stepper motor produces rotation, the lead screw converts it into precise linear movement, the plunger compresses the syringe contents, pressure builds in the barrel, and the material is forced through a narrow needle.
Rebuilding changed how I saw the machine. Before, it was a piece of laboratory equipment. Now it was a carefully engineered system where mechanics, electronics and material science work together to control the flow of a paste. The printer had become my first teacher.
Chapter 3: Paste Printing and Why Toothpaste Works
The day the printer was rebuilt, I walked into the lab unusually confident. I imagined loading a sophisticated hydrogel and watching a beautiful scaffold emerge layer by layer, like the pristine lattices in research papers. Instead, my mentor suggested starting with toothpaste. He wasn’t joking.
My first question was immediate: “Why toothpaste?” It seemed almost too ordinary. But engineering has a habit of replacing assumptions with understanding. I had been thinking about bioinks in terms of what they were made of, not how they behaved. Instead of asking whether toothpaste was a biomaterial, I began asking whether it behaved like one during printing.
That evening I started reading. Many extrusion-based bioinks are highly viscous materials that don’t flow unless enough pressure is applied, and once they leave the nozzle they must hold their shape long enough to support the next layer. Toothpaste does the same. Engineers call it a shear-thinning material, and the idea is intuitive:
- In the tube it is thick and doesn’t drip out on its own.
- When you squeeze, the applied force lets it flow smoothly through a tiny opening.
- Once it lands on the brush and the squeezing stops, it stays where you put it.
Without realising it, I had been observing rheology every morning while brushing my teeth.
Toothpaste is also commonly used as a practice material while developing extrusion systems. It is inexpensive, safe, non-toxic and forgiving, and it lets you study extrusion mechanics without sterile conditions or the risk of damaging living cells. Failures become cheaper, experiments faster and learning less intimidating. The toothpaste wasn’t replacing a bioink; it was teaching me how to use one. Some toothpastes even contain hydroxyapatite, a calcium phosphate mineral that makes up much of human bone and teeth, which made me smile, although their formulation is entirely different from medical-grade biomaterials.
Of course, toothpaste is not a real bioink. It cannot support living cells or promote tissue regeneration. But that was never its purpose. Its purpose was to teach.
I also learned that successful extrusion depends on far more than pushing material through a nozzle: viscosity sets the pressure required, nozzle diameter sets flow resistance, speed sets volumetric flow, layer height decides whether strands support each other, and even small temperature changes can matter. Printing is really a balancing act. I no longer expected my first print to succeed on the first attempt; in fact I hoped it wouldn’t, because every failure would reveal something new.
Even loading the syringe was part of the experiment: remove the plunger, fill the barrel carefully, avoid trapping air and slide the plunger back without forcing paste out. The printer couldn’t compensate for mistakes made before printing even began. Standing in front of it, I wasn’t thinking about printing a scaffold anymore. I was thinking about pressure, viscosity, nozzle resistance and flow. And I had already learned my first lesson in extrusion bioprinting: sometimes the simplest materials are the best teachers.
Chapter 4: Four Lines That Changed the Way I Printed
With the printer rebuilt and a syringe of toothpaste ready, I thought I was about to print my first scaffold. Instead, my mentor said I needed to calibrate the instrument first. I opened SketchUp, drew four straight lines and printed those. “That’s it?” I thought.
He explained that every scaffold, however intricate, is thousands of individual lines deposited one after another. If a single line can’t be printed accurately, there is no point attempting a scaffold. The goal wasn’t to create something impressive; it was to understand the extrusion system.
Interestingly, we began without a dispensing needle. Removing it reduced the resistance to flow, so we could study the material without adding another variable. Preparing the syringe also mattered far more than I expected. Unlike toothpaste, air compresses, so the stepper motor can keep pushing the plunger while trapped air absorbs the movement. The result is delayed extrusion, inconsistent line widths or sudden bursts of material. I learned to fill the syringe slowly and remove as much air as possible.
When the printer moved for the first time, every part I had assembled did exactly what it was designed to do, and a continuous strand of toothpaste landed on the petri dish. It wasn’t a scaffold, or even a perfect line, but the whole system was finally working together. Of course, the first print had flaws: some sections were thicker than others, material spread after deposition, extrusion started late and sometimes kept flowing after the printer stopped. Syringe extrusion builds and releases pressure gradually rather than starting and stopping instantly.
Every imperfection was trying to tell me something:
- A thick line meant too much material for the chosen speed.
- A thin or broken line meant too little pressure or movement that was too fast.
- Blobs at the ends meant pressure remained in the syringe after motion stopped.
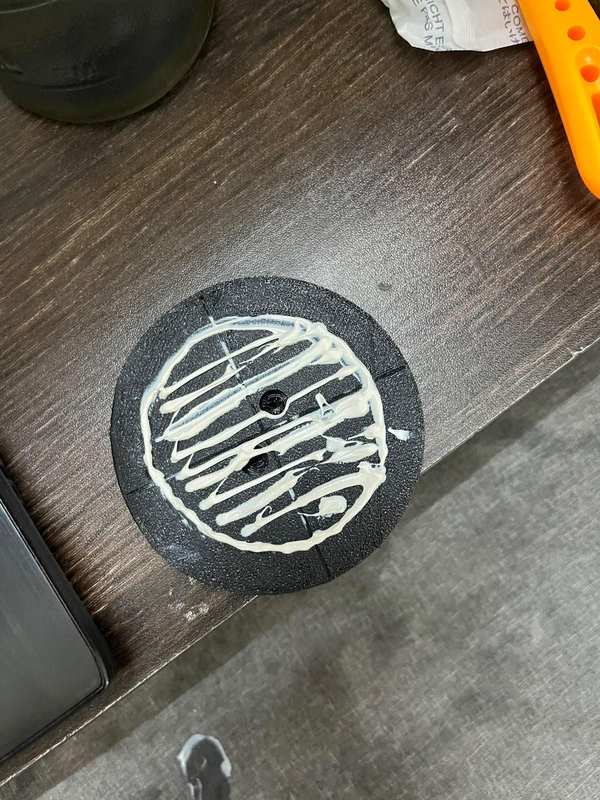
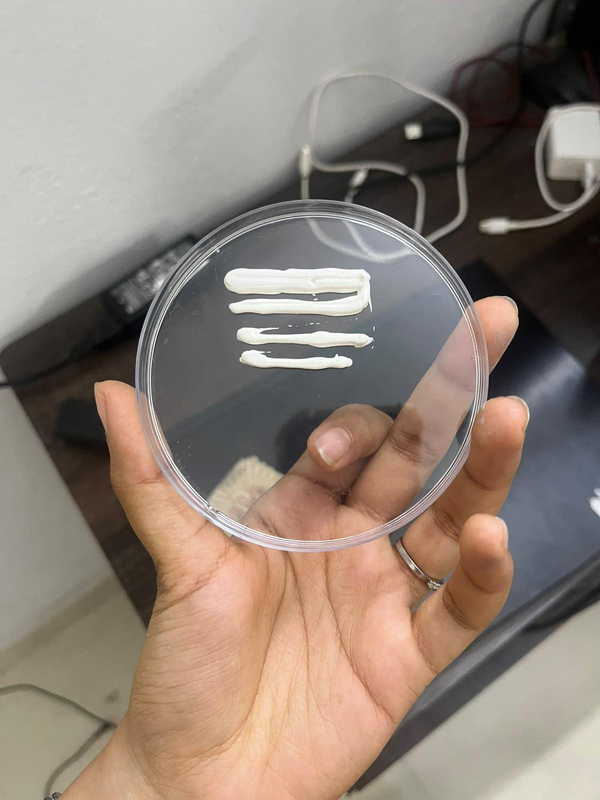
I started connecting what I saw on the dish to the settings in Cura. Higher speed meant the syringe had to supply more material in the same time; if it couldn’t keep up, lines turned thin or broke. Too much flow gave thick, flattened lines, too little gave weak, inconsistent extrusion. Even nozzle height mattered: too close and the paste spread sideways, too high and it fell onto the surface instead of being placed accurately. Small adjustments, sometimes a fraction of a millimetre, gradually improved the lines.
By the end of the day those four lines no longer looked boring. They were a record of everything the printer was trying to teach me. And I understood that calibration is not a step you rush through to reach the “real” experiment. Calibration is the experiment. Before attempting something complex, learn to perfect the simplest thing first.
Chapter 5: A Tiny Needle, a Huge Difference
Next, my mentor handed me a dispensing needle. I assumed it would just make the lines thinner. I couldn’t have been more wrong. The printer hadn’t changed, the toothpaste hadn’t changed and the model hadn’t changed. Only the diameter of the outlet had, yet it felt like a different machine.
The narrower opening increased the resistance to flow, so far more pressure was needed to push the same amount of toothpaste through. Extrusion started late, leaving gaps at the start of lines, or released too much at once. Every setting I had tuned during calibration had to be reconsidered. This time, though, I had a basic understanding of what each setting controlled:
- Print speed had to be reduced so the syringe could build pressure and keep a continuous flow.
- Flow needed a balance: too little made thin, broken strands, too much merged neighbouring lines.
- Line width and layer height were linked: too much material in a thin layer spread sideways, while too tall a layer left strands barely touching.
None of the Cura settings existed independently. Every parameter affected several others. So I created a second profile for printing with the needle. The first profile prioritised consistency and worked without the extra resistance. The new one had to produce narrow, continuous strands that could form a 3D scaffold. Print speed was reduced, flow recalibrated, retraction left disabled (syringe extrusion behaves very differently from filament printing) and acceleration kept low to avoid sudden pressure changes.
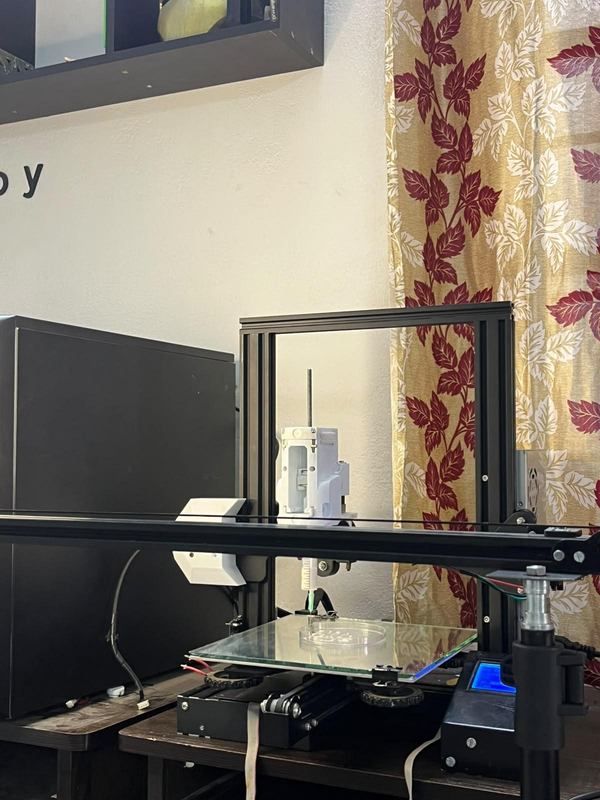
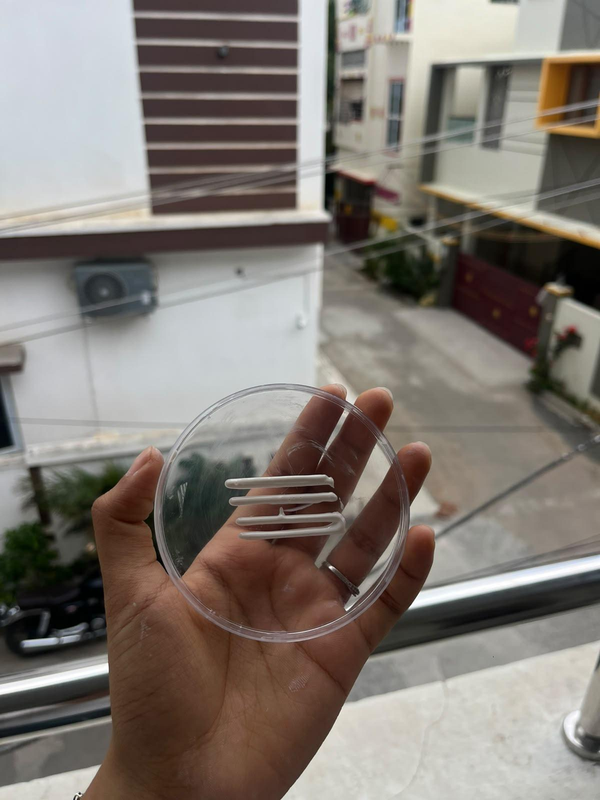
I also realised that Cura wasn’t designed for syringe extrusion. It was built for printers that melt and deposit thermoplastic filament, and as far as Cura was concerned, it was controlling an ordinary plastic printer. So I had to interpret every setting in the context of a syringe system. Unlike filament, toothpaste didn’t stop flowing the instant the printer stopped moving, because pressure stored in the syringe kept pushing material out. Instead of asking “Which setting should I change?”, I began asking, “What is physically happening inside the syringe right now?”
I finally attempted the gyroid scaffold that had inspired the whole journey. The first attempts were far from successful: layers merged, walls collapsed and extrusion became inconsistent midway. For a while I assumed the answer was hidden in Cura’s menus. But sometimes the printer was simply following the instructions it was given, written in a file of hundreds of lines that looked more like computer code than 3D printing. It was called G-code.
Chapter 6: Speaking the Printer’s Language with G-code
Every time I sliced a model in Cura and sent the G-code to the printer, little things disrupted the print. The printer began by homing to the corner of the bed, as a desktop FDM printer should. But my prints were made inside a small petri dish at the centre of the bed, so the long trip to the corner was unnecessary and increased the chance of misalignment. I searched Cura’s menus without finding a fix. Then my mentor said something that sounded intimidating: “If Cura can’t do it, change the G-code.”
I had never opened a G-code file. Instead of trying to understand it all at once, I read it one command at a time. Commands like G0 and G1 control movement, G28 tells the printer to home its axes, and feed rates set how fast moves happen. It wasn’t a complex programming language, just a list of instructions. Once I understood that, I stopped being afraid of it.
| Problem I observed | G-code change | Result |
|---|---|---|
| Printer homed to the bed corner before every print | Removed the homing sequence and moved straight above the petri dish | Prints started exactly where I wanted |
| The next layer deformed the one below | Inserted a timed pause after every layer | Layers held their shape, the scaffold was more stable |
| Paste kept oozing during pauses and left blobs | Lifted the needle in Z and moved away before each pause, then returned | Excess paste landed away from the scaffold |
Toothpaste doesn’t solidify like molten plastic. It keeps its shape reasonably well but still needs a little time to settle before supporting another layer, which is why the pause helped. But pressure stayed trapped in the syringe during each pause, so toothpaste kept oozing and left an unwanted blob exactly where the printer had stopped. The fix was to lift the needle slightly and move it a short distance away before every pause, then return to the exact point and continue.
None of these modifications was complicated on its own. The difficult part wasn’t writing the commands; it was recognising the problem they needed to solve. Every change was driven by something I had observed, because the physical behaviour of the material demanded it. Gradually I stopped searching for the “perfect” Cura profile and built one that matched my printer, my material and my experiment.
After many small adjustments, failed attempts and repeated prints, I returned to the gyroid scaffold. This time everything came together. The printer moved straight to the centre of the dish, extrusion began smoothly, each layer paused long enough to settle and the needle lifted away during every pause. Layer by layer, the gyroid structure slowly emerged exactly as I had imagined weeks earlier.
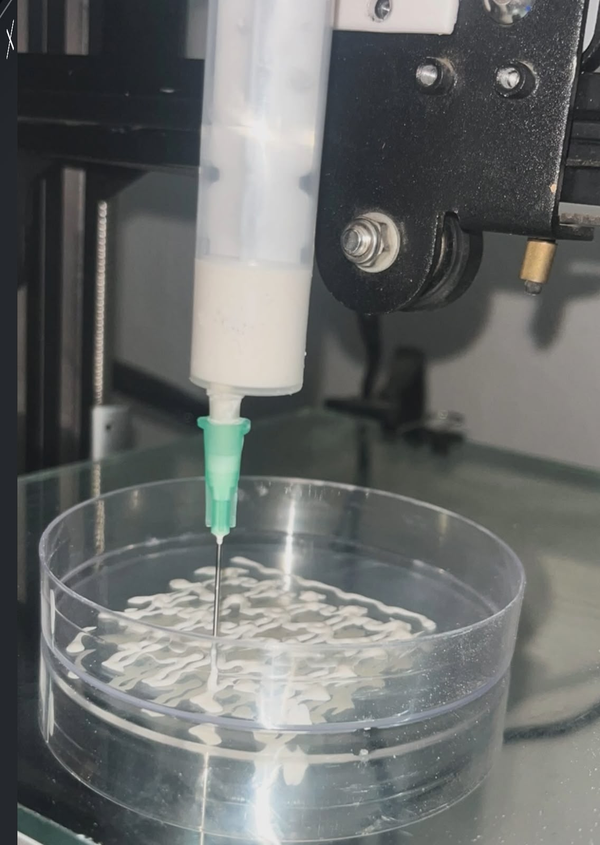
What the Printer Taught Me
Holding the finished scaffold was surprisingly rewarding. To someone else it might have looked like a small structure printed from toothpaste. To me it represented every lesson of the internship: rebuilding the printer piece by piece, struggling with supports, learning why toothpaste behaves like a bioink, printing countless calibration lines, understanding the effect of a needle, creating new Cura profiles and editing G-code for the first time.
When I began, I thought bioprinting was simply another form of 3D printing. By the end, I realised that successful bioprinting isn’t about finding the right settings or following a checklist. It is about understanding the relationship between mechanics, material science, fluid dynamics and software, and using that understanding to solve problems one at a time.
Bioprinting and 3D Printing Training in Coimbatore, Tamil Nadu
Medsby is based in Coimbatore, Tamil Nadu, and works with students, labs, clinics and startups across India. If you want hands-on experience in 3D printing, bioprinting or microfluidics, explore our 3D printing services, industrial training and academic lab programmes. More from this author: Unlearning to Build and Microfluidics with FFF Printing.
Frequently Asked Questions
What is syringe extrusion bioprinting?
Syringe extrusion bioprinting is a 3D printing method in which a stepper motor drives a plunger that pushes a viscous material, such as a hydrogel bioink, through a dispensing needle to build a structure layer by layer.
Why use toothpaste to test a bioprinter?
Toothpaste is a highly viscous, shear-thinning material, so it behaves much like many printable hydrogels. It is safe, cheap and forgiving, which lets you learn extrusion mechanics without the cost and sterility demands of living cells.
What does shear-thinning mean?
A shear-thinning material is thick and holds its shape at rest but flows easily when force is applied. Toothpaste in a tube is the everyday example: it stays put until you squeeze, then flows, then holds its shape again once deposited.
Is toothpaste a real bioink?
No. It cannot support living cells, promote tissue regeneration or mimic the biological environment of real bioprinting. It is a practice material that teaches how extrusion behaves before real bioinks are used.
Why do air bubbles in the syringe cause problems?
Unlike toothpaste, air compresses. The plunger can keep moving while compressed air absorbs the motion, causing delayed extrusion, inconsistent line widths or sudden bursts of material once the pressure becomes high enough.
Why remove the needle for the first calibration prints?
Removing the needle lowers the resistance to flow, so you can study how the material behaves without adding another variable. Fine resolution isn’t the goal at that stage; understanding extrusion is.
Can Cura be used for syringe extrusion bioprinting?
Yes, with care. Cura was designed for filament printers, so it doesn’t know about syringe pressure. Settings such as speed, flow, layer height, acceleration and retraction must be interpreted for a syringe system, and the G-code sometimes needs editing.
Why edit G-code for a bioprinter?
When slicer settings can’t do what the experiment needs, the G-code can. In this project, editing it removed an unnecessary homing move, added a pause after each layer and lifted the needle away from the scaffold during pauses.
Where can I learn bioprinting or 3D printing in Coimbatore, Tamil Nadu?
Medsby, based in Coimbatore, offers 3D printing services and hands-on training for students, labs and startups across Tamil Nadu and India. Contact the team to ask about opportunities.
Project Engineering Intern, Medsby, Coimbatore | B.Tech Bioengineering student
Niilee is currently pursuing a B.Tech in Bioengineering and has always been someone who loves learning. Whether through books, conversations, new experiences or scientific discoveries, she enjoys understanding how things work and exploring ideas that challenge her to think differently. Curiosity has always been one of her biggest motivations, and it is what drew her towards fascinating technologies like 3D printing and microfluidics in the first place.

Founder & CEO, Medsby Healthcare & Engineering Solutions
Guruprasandh is the founder of Medsby, a Coimbatore-based manufacturer and technology service provider established in 2014, specializing in wearable technology, healthcare devices, and 3D printing. With over a decade of experience in healthcare technology and engineering, he is committed to knowledge sharing, upskilling, and educational training for students and young innovators.
Keep exploring
Ready to learn by building?
Talk to the Medsby team in Coimbatore about 3D printing, bioprinting and hands-on training for your college, lab or startup anywhere in India.
Industrial training Talk to our team